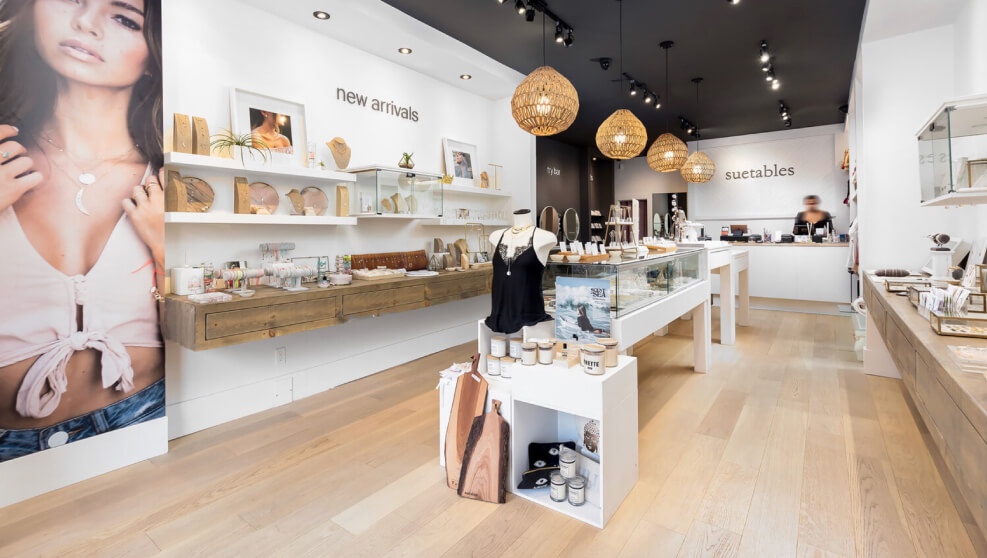
Photos make a huge impact on your e-commerce store, especially when your reach is beyond the city you live in and in-person retail is limited. When e-commerce photography is done well, it mostly goes unnoticed, but when done poorly, it stands out like a sore thumb.
E-commerce can be intimidating, and you might think you need fancy studio lights and highly technical knowledge to make your products shine, but let’s work with what you have and use some simple settings to get you going and level up your images.
Two things I want to stress about product photography is accuracy and uniformity. When I visit a site, images should be consistent in colour, exposure and cropped correctly. When viewing an item, the customer should receive it exactly as they see it, which is why accuracy in colours and scale is so important.
iPhones are powerful tools, and in some circumstances, you can get by with it to take photos. However, I’d still recommend a camera (whether that’s an old DSLR or a hand-me-down) that lets you have full manual control over settings to make this a bit easier. We’ll stay away from full auto mode here, and I’ll guide you through shooting manually.
The great thing about photography is, regardless of the camera, these principles are transferable among any system. Here are 5 strategies and settings to consider to make your images seamless and help sell your products:
*All images are straight out of camera with no retouching or editing unless stated
1. How to frame your products
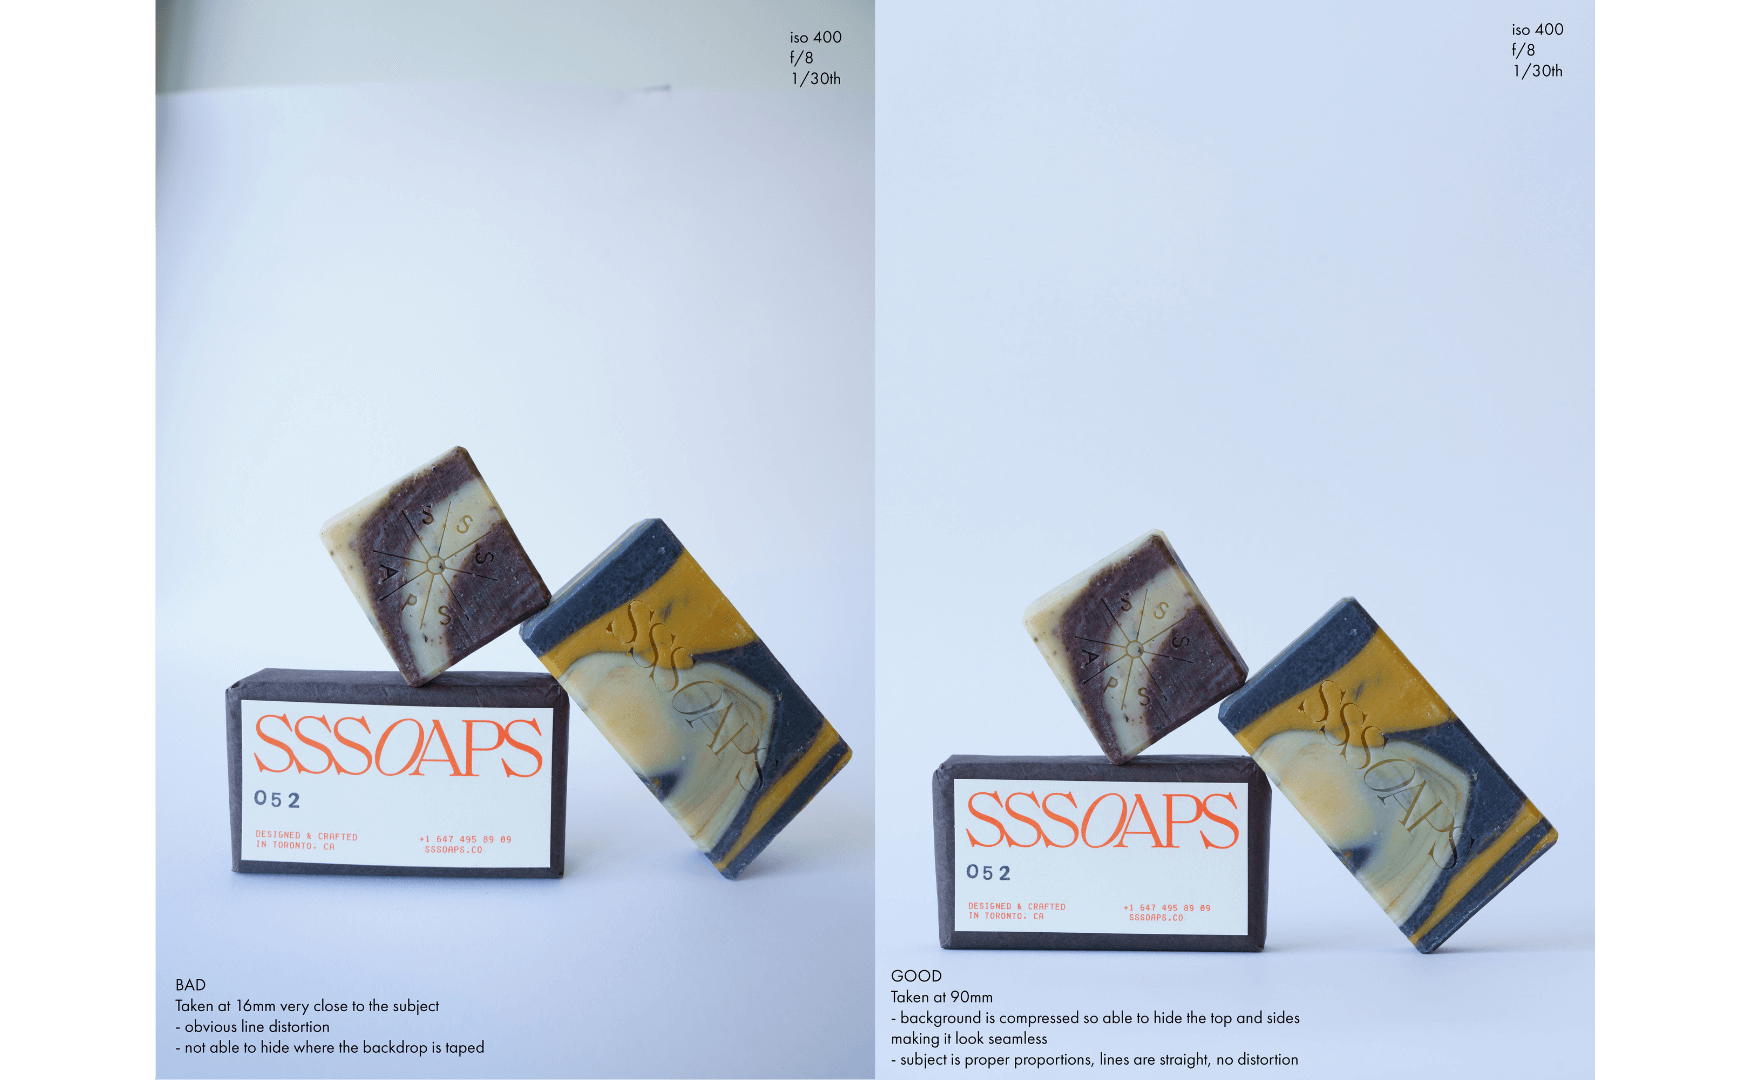
Let's say you start with your kit lens included with your camera (generally an 18-55mm), you’ll want to zoom in (closer to 55mm) to avoid distortion and compress your subject. This will more accurately capture the scale of your product and allow you to have a smaller area of background to shoot on. The focus is placed on your subject and avoids any distractions in your space. Here, I’ve taped some white paper up against the wall and on top of a small table for my simple background.
2. When to take advantage of your window for soft, natural light
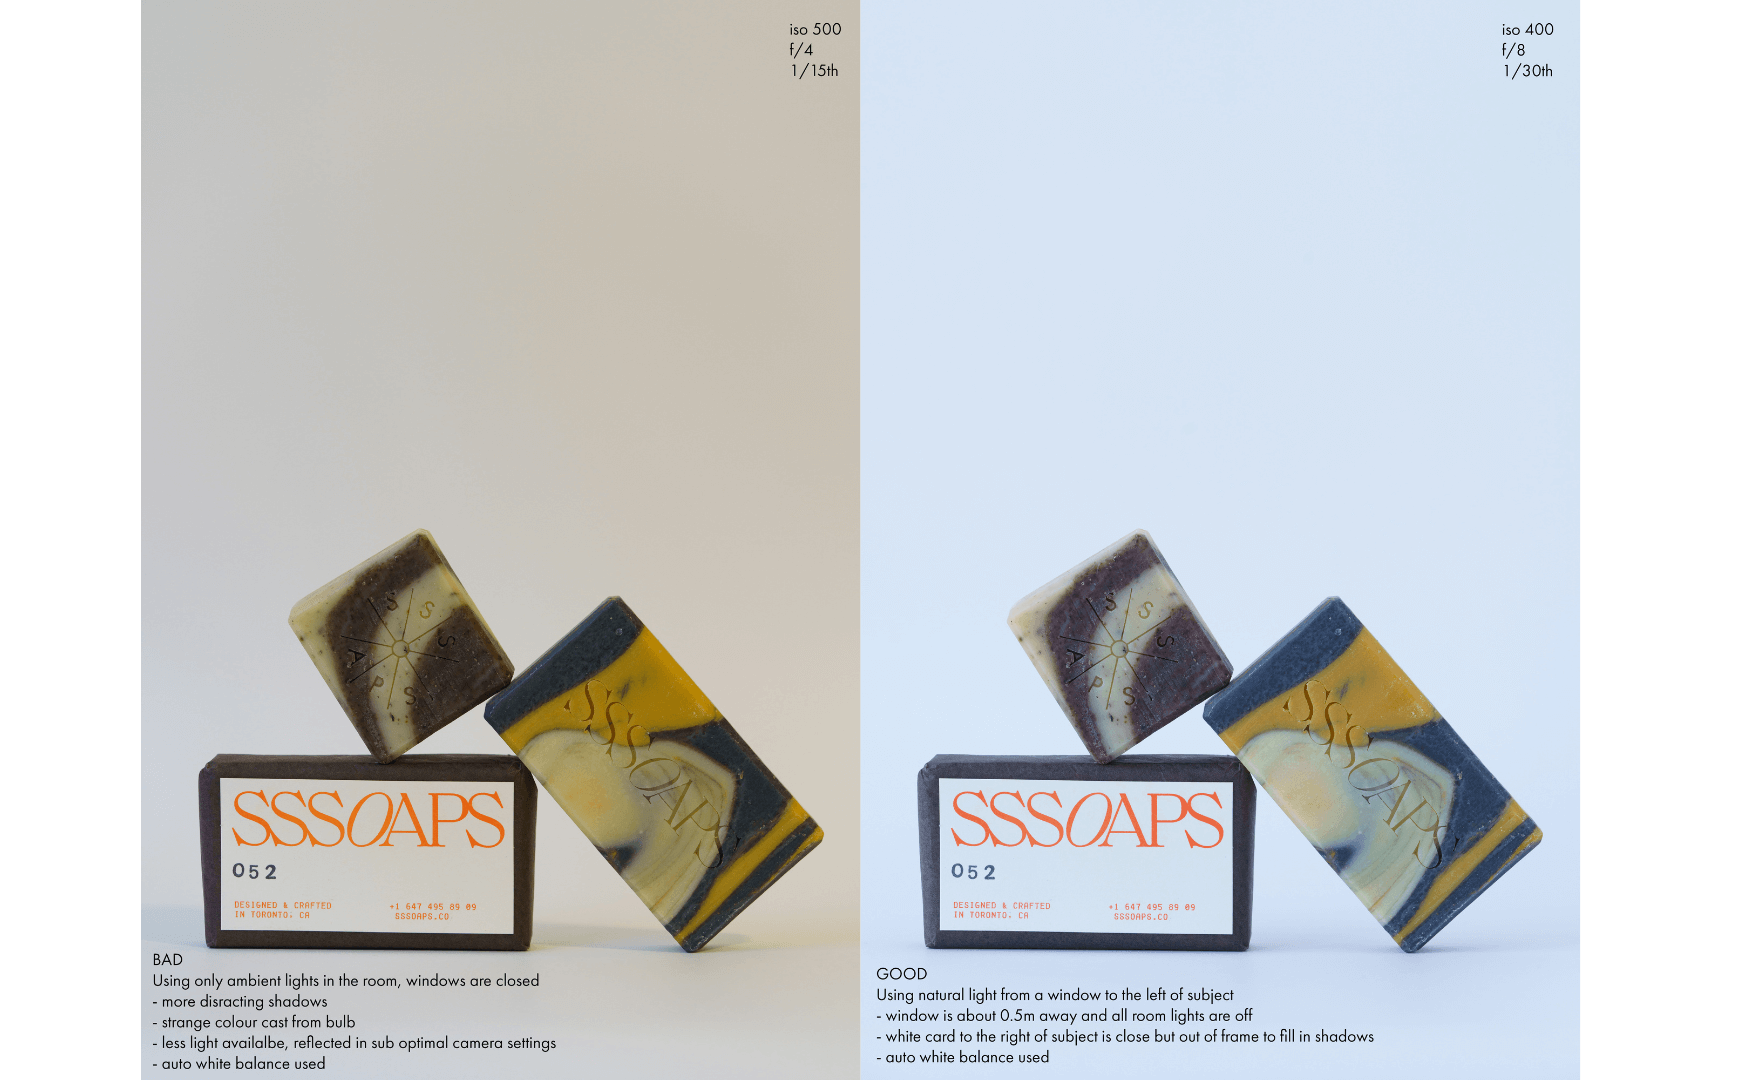
Take advantage of natural light if you’re not able to invest in studio or off-camera lighting. You’ll want to turn off any lights in your room to avoid colour cast or pollution and put your subject close to a window (no more than 2m away or the fall off from the light will be too dark). This works great on an overcast day, or if you have indirect sunlight. Try using a thin white bed sheet if you have direct sun to diffuse that harsh light.
I would use another piece of paper on the opposite side of the window beside your subject to fill in the shadows created by the single source window. Larger items will present more of a challenge here, so you might have to get creative.
3. How to maximize sharpness
The “f/“ number correlates to the size of the opening in your lens or what is known as the aperture. Lower numbers, like f/2, denote a larger opening that lets more light into the lens However, this will result in shallower depth of field, such as less things being in focus.
You’ll generally want to use a higher number here (a smaller aperture) to make the opening smaller (try f/5.6, 8, 11) to maximize the sharpness of your product and retain more things in focus.
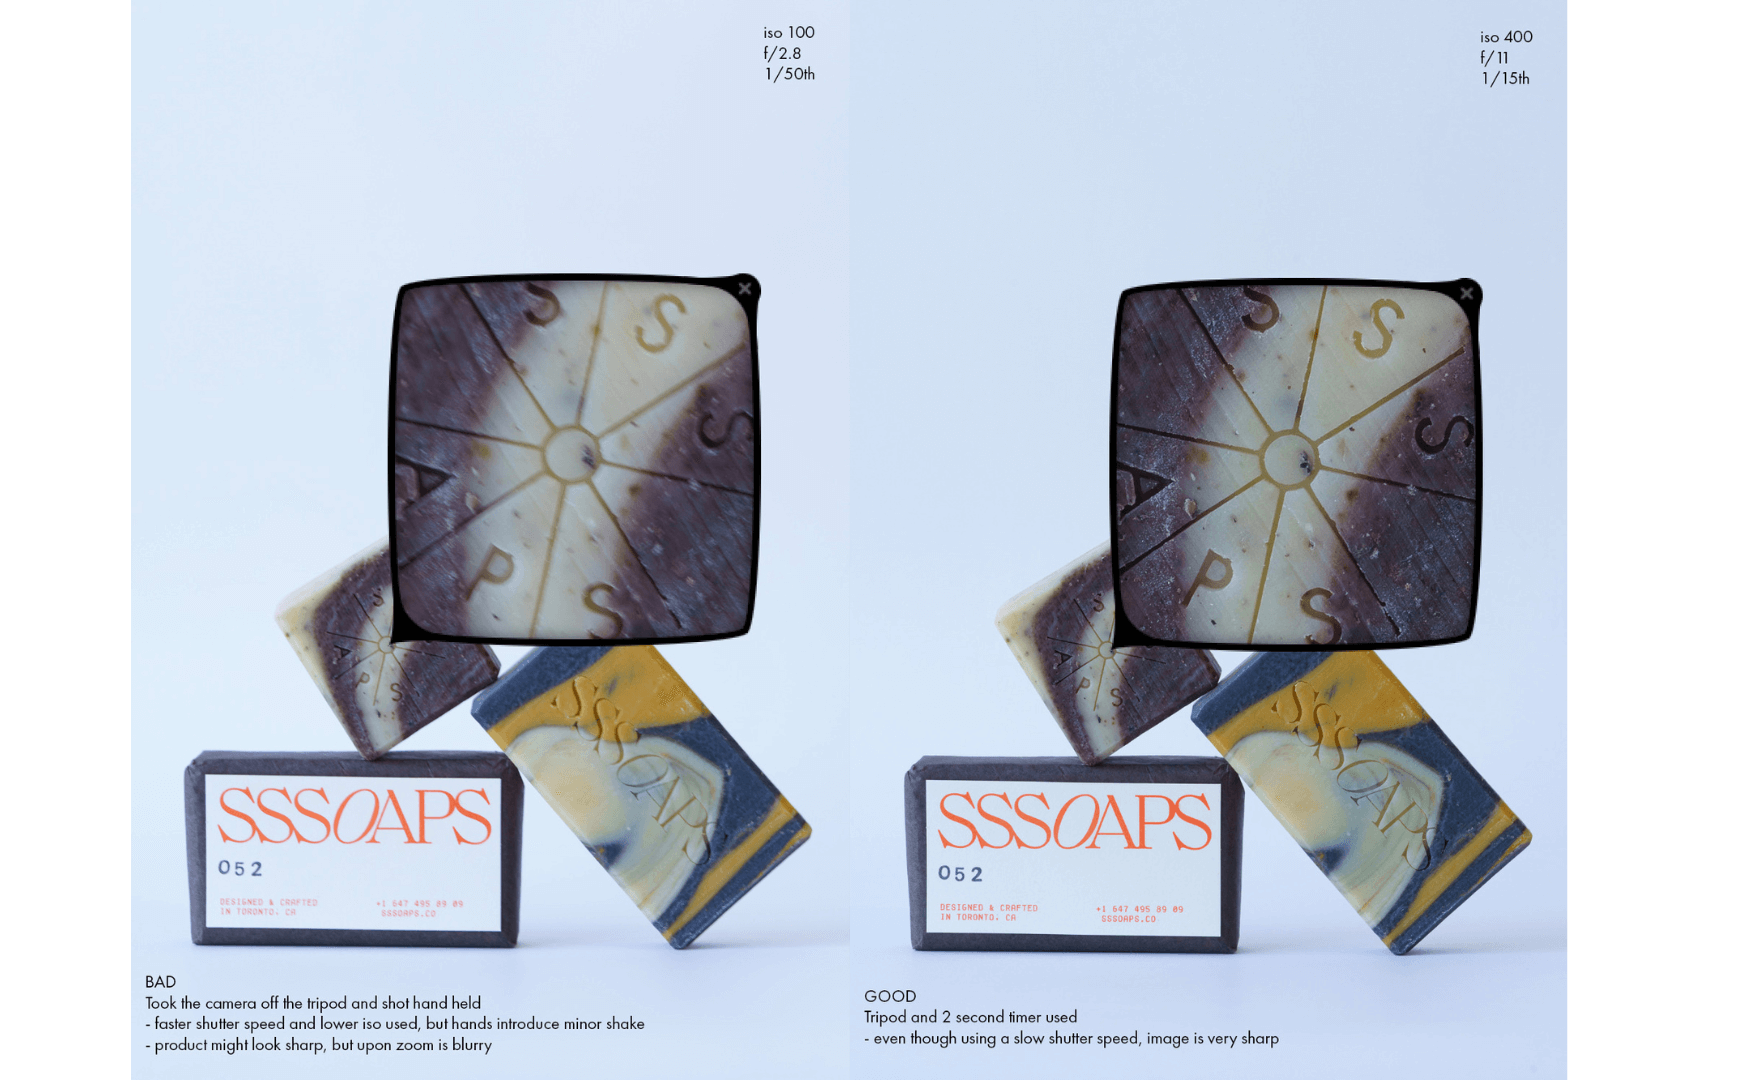
This will depend on how much light you have to work with as well, so having a tripod setup can be very helpful. It will help to keep everything consistent in the same place for uniformity and help avoid any camera shake from slow shutter speeds.
Using the 2-second timer here helps as well to avoid you pressing the shutter button and inadvertently shaking your camera during the exposure.
Turning on grids if your camera allows it will also help with getting things lined up in camera.
4. Getting the right exposure
I like to err on the side of overexposure. You can use the highlight clipping function or look at the histogram to make sure your background is bright, but you don’t want your product blown out. Alternatively your camera should have a meter in the viewfinder or on the back of the screen in the bottom centre with a “0” in the middle. This lets you know how close to an even exposure you are. If the arrow is to the right, you’re overexposing, and if to the left, you’re under-exposing.
ISO is the sensitivity to light of your camera sensor. Lower numbers, like 100 are generally preferable as you maintain sharper and cleaner images. That said, don’t be afraid to experiment and increase them as cameras these days can handle noise quite well. I would avoid too high ISOs, so consider staying below 1600 for the noise. Lower ISOs will produce better quality images. You can see in the above images I chose to use ISO 400, which let me use the ideal settings I was looking for. Since we are at the mercy of whatever the light might be like that day and we may want to use a smaller aperture, our ISO and shutter speed are going to be flexible. This is why having a tripod is helpful for those slow shutter speeds.

5. White balance and colour accuracy
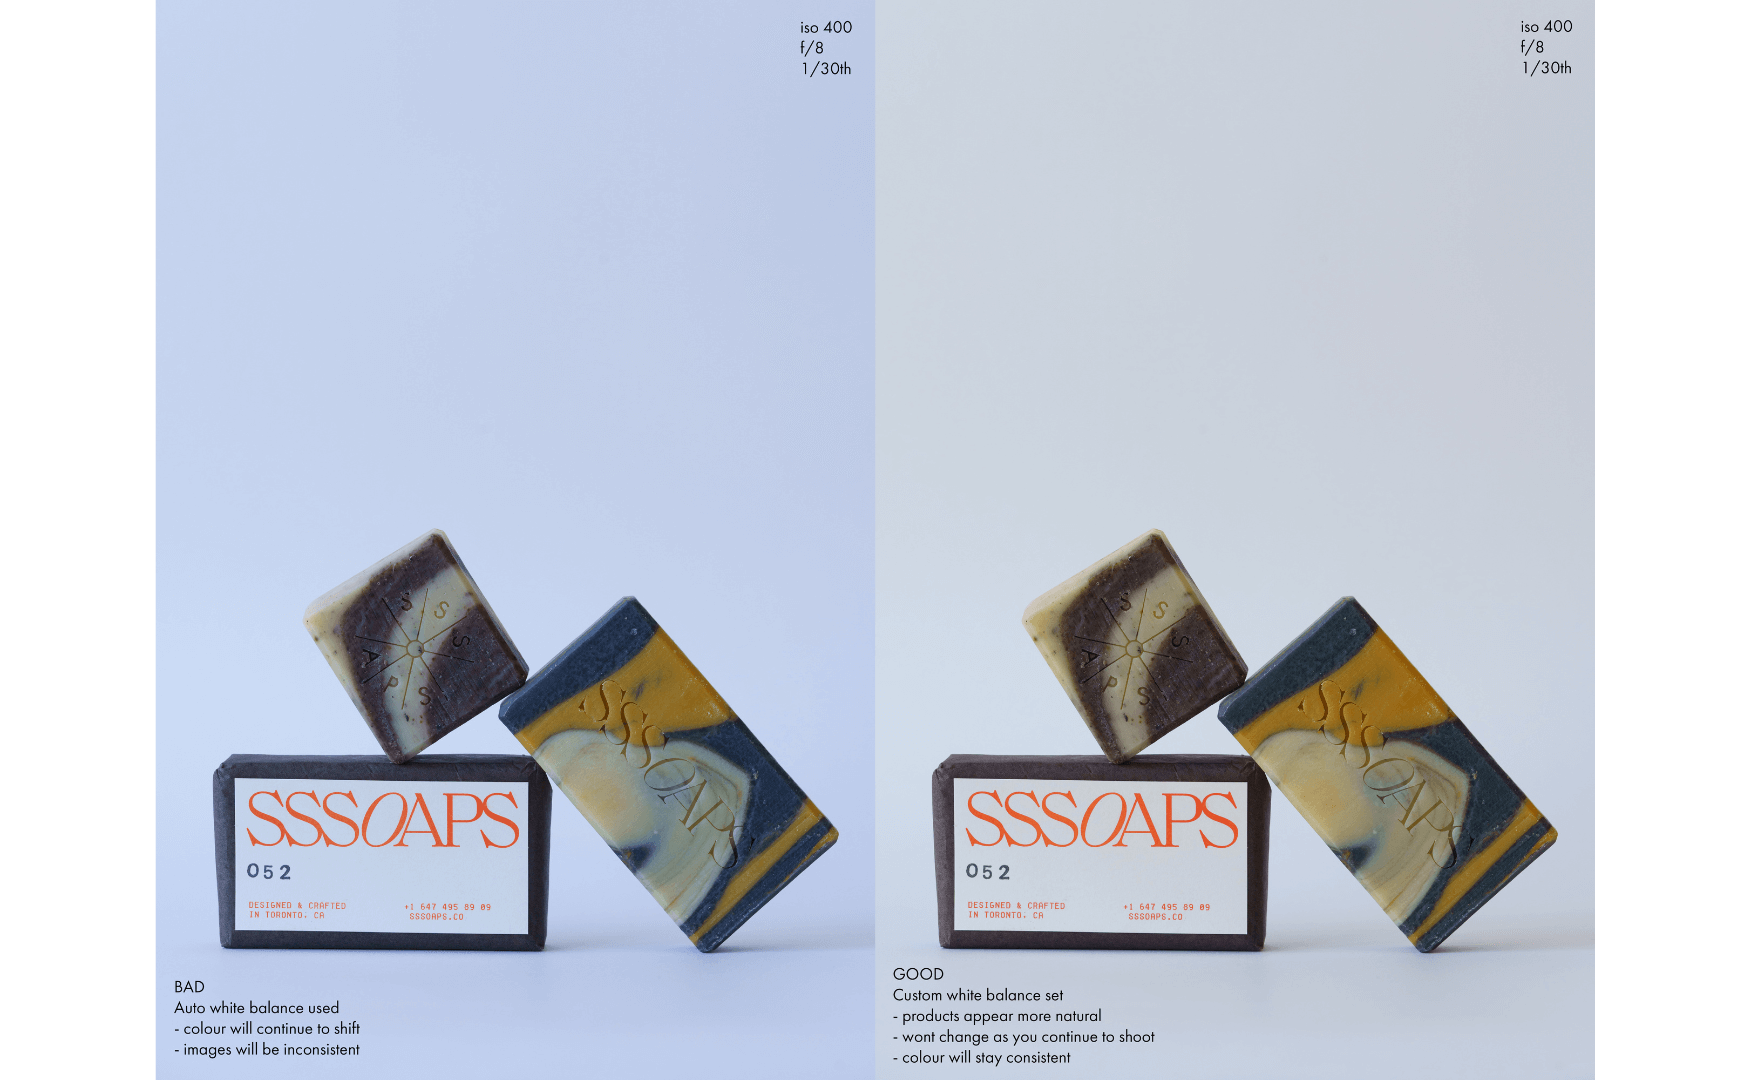
I like to get things as close as possible in camera to avoid more work in post-production later. I would recommend setting your white balance to a fixed preset, ie. daylight to avoid colour shift variations that would occur if you were to leave it in auto and shoot multiple products. Having a grey card to set a custom WB here is preferred, but that’s a little more advanced. You want to have as neutral a WB as possible to avoid your product looking too blue or yellow.
If you do plan on editing your images afterward as well (which I would recommend), shooting on RAW if your camera allows it is necessary for the most information to be there when you do so. If you’re shooting only on jpeg, your images are already being compressed and will lack the latitude needed in post.
6. Iphone tips
Understandably, if all you have access to is an iPhone or smartphone camera, here are a couple of tips to help you out.
- I would still recommend a tripod in this case for consistency, you’ll usually need a phone holder that can attach to an existing tripod.
- Overlay grids when shooting in your camera app to keep things straight.
- Turn your flash off auto and keep it off while shooting products.
- Use the telephoto lens if your phone has one. (Don’t digitally zoom in)
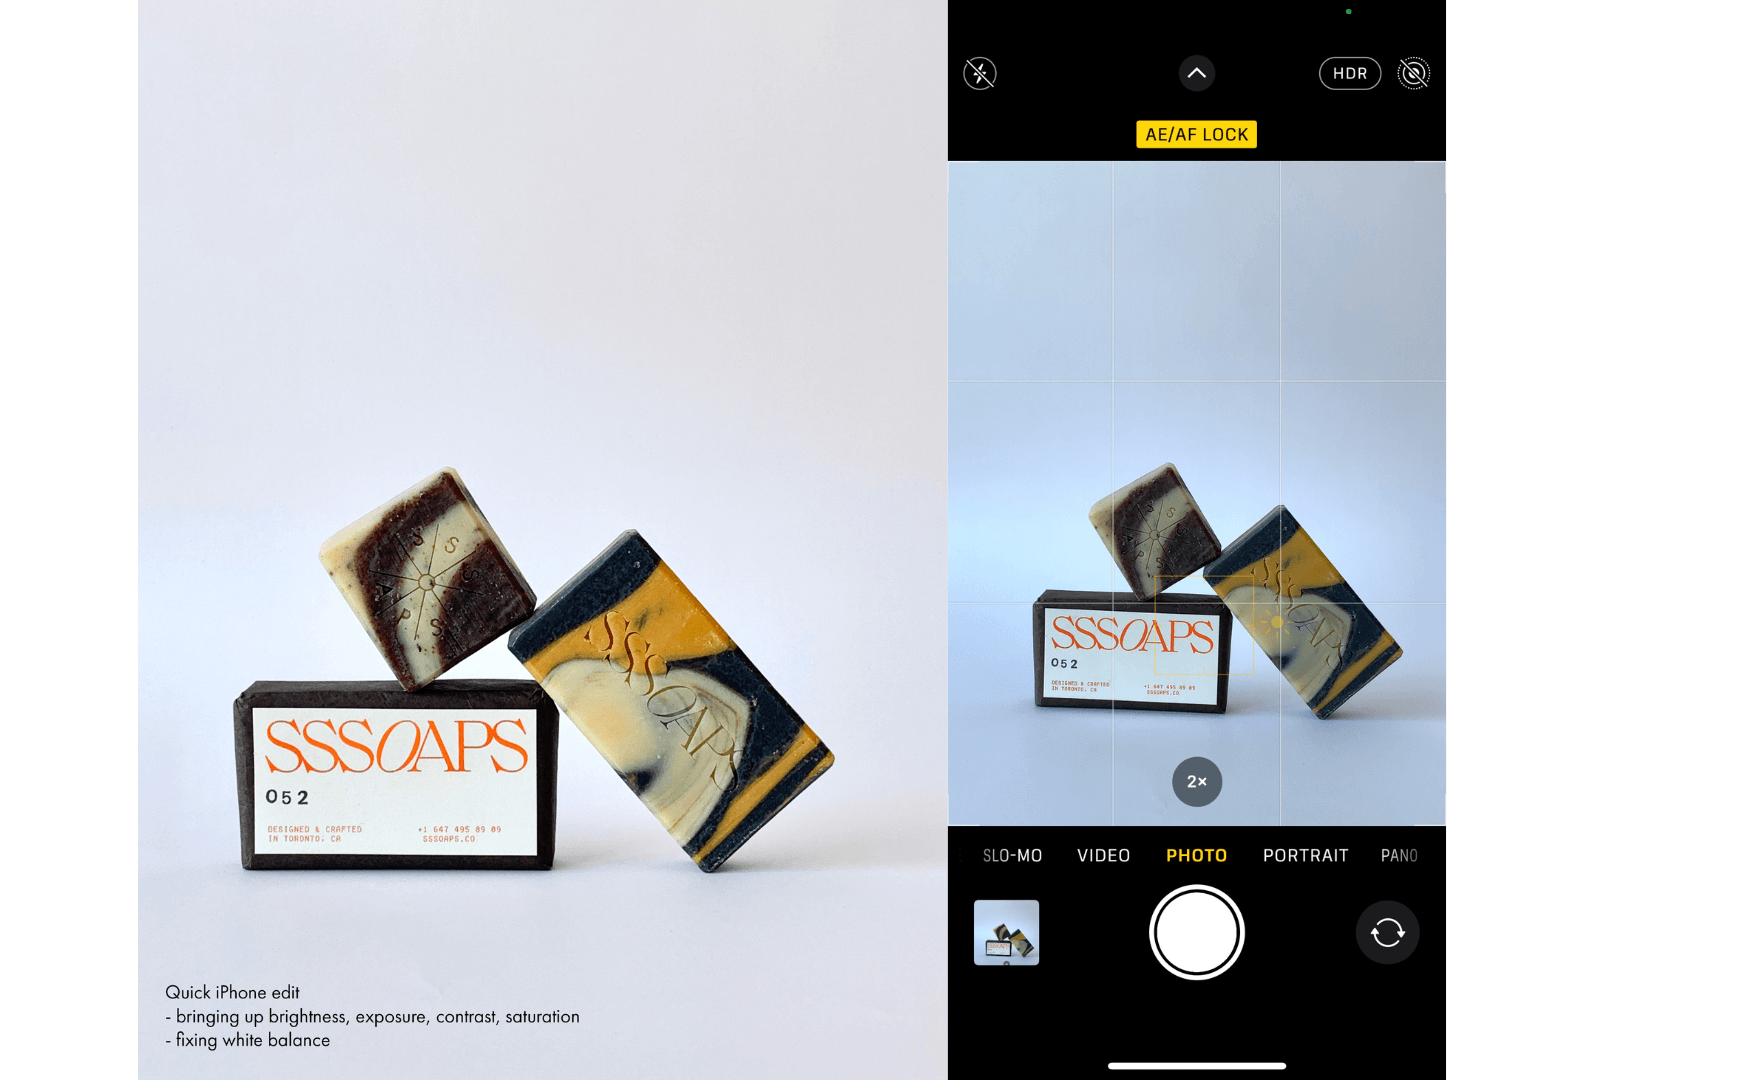
- In terms of exposure, my biggest tip is using the autofocus / auto exposure lock while shooting. This is usually done by pressing and holding your finger down on the object you’re focusing on for a short while and it should lock focus and exposure on that one spot. You can slide your finger up and down additionally to brighten or darken the image. I would shoot all my products after setting up that first shot for the greatest consistency.
About the Author
Tyler Hayward is a lifestyle and commercial photographer based out of Toronto, Canada, specializing in portraiture.
Born and raised in the city, Tyler has been telling visual stories in both film and digital for over 10 years. A self-taught photographer inspired by his community and peers, Tyler is keenly focused on education and collaborating with creatives in the city. He has formerly worked as the lead in-house photographer for both Canadian sneaker boutique Livestock and global fine jewelry brand Mejuri.
Learn more about Tyler at www.tylerhayward.photo or on Instagram at @tilore


